Tuesday, August 25, 2009

Linux Authentication with Active Directory 2003 R2

One way of simplifying your authentication environment is to use a single authentication source for all of your nodes - Windows, Linux or Unix. You can authenticate them all against a directroy service such a Active directory or eDirectory. In this article we'll describe how to unify your Linux and Active Directroy environment. with minor changes, this same procedure can be used to authenticate your Linux hosts against eDirectory or any other LDAP compliant Directory Service.

Windows 2003 is nothing but customized version of LDAP and attributes. We can modify and extend schema of windows LDAP to store custome values and attributes. SFU ( Service for Unix) package doing same thing which can extend microsoft ldap schema and make it compatibale to store Linux/Unix POSIX compliant attributes. SFU is freely available for windows 2000/2003 early version but Windows 2003 R2 version as inbuilt Unix managment capability so you do not need to install SFU or extranal software.

Following is my setup to configure Linux to authenticate against active directory.

1. Enable Unix/Linux Identity Managment for Unix in Windows 2003 R2

Start > Settings > Control Panel > Add/Remove Windows Components and select Active Directory Services


2. Once this installed you can see new tab in Active Directory Users and Computers inside User management properties. And select NIS Domain (which is default Domain name) define UID, GID, Home Directory of user which you want at Linux/Unix for users side at logon.


(Notes :- I have created new OU with UNIX name and created three different OU inside UNIX , People, Groups & Computers for easy management. You can use anyname you like)

3. Linux workstation configuration file following.

a. /etc/ldap.conf
b. /etc/nsswitch.conf
c. /etc/krb5.conf
d. /etc/pam.d/system-auth

Following my configuration files.

#cat /etc/ldap.conf


# cat /etc/nsswitch.conf

passwd: file ldap
shadow: file ldap
group: file ldap


# cat /etc/krb5.conf


# cat /etc/pam.d/system-auth
(Notes : Please compile or install latest version of pam_krb5.so. older version has some bug which break your functionality)

I have compiled pam_krb5-2.3.7 which support force password change at next logon.


After done all the above changes you can run getent command to check list of user created in AD.

#getent passwd
#getent group


TEST Configuration:

Create user account with option "User must change password at next logon"
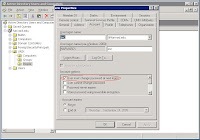


Now try to login at Unix/Linux workstation with user.


Single Sign on (SSO) Configuration with OpenSSH.


Logged into Windows 2003 R2 and run following command to generate keytab file for kerberos services principal.

c:\>ktpass -princ host/linux01.example.com@EXAMPLE.COM -mapuser EXAMPLE\linux01 -crypto rc4-hmac-nt -pass * -ptype KRB5_NT_SRV_HST -out linux01.keytab

(EXAMPLE.COM is a realm of kerberos or Domain name of Windows 2003 it should be Upper letter, and EXAMPLE\linux01 is NetBios name of Domain and workstation of Linux, -pass * command will ask you for workstation password any password which you want to set for workstation)

c:\> setspn linux01

(setspn will Registere ServicePrincipalNames)

Now copy linux01.keytab file securly on linux01 workstation and rename and copy inside /etc/krb5.keytab

Verifiy keytab with following command

#klist -keK /etc/krb5.keytab

TEST SSO Login for SSH.

Loggied into Linux workstation (linux01 in my example)

Get kerberos ticket run following command.

#kinit username

Verifiy kerberos TGT ticket to run following command.

#klist

Run SSH and it will not ask you for password this time because you have kerberos ticket already.

#ssh username@linux01

Best of Luck for your configuration.


Friday, May 1, 2009

Solaris 10 basic commands

useful OS information gathering commands

1. cat /etc/release
2. showrev
3. uname -a

Determine configured memory (includes physical memory)

1. prtconf

Determine installed processor (includes physical/virtual)

1. psrinfo
2. psrinfo -v (list virtual processors and info)
3. psrinfo -pv (list physical and accosiated virtual processors)

Determine processor platform arch and bits

1. isainfo
2. isainfo -bv (more info about processor flags)
3. isalist (list feature of processors)

Determine and change system timestamp

1. date (to reveal current timestamp)
2. date '+DateTime: %m.%d.%y @ %H.%M.%S'
3. date mmddHHMMccYY
i.e : date 050817252009 ( change system time to May 8 17:25:00 EDT 2009)

Determine current running process on system

1. ps, ps -ef
2. pgrep (search process list for matching program i.e pgrep sshd)
3. pkill (searching matching program and kill them unless a different signal is sent : i.e 'HUP')
4. pwdx (list the working directory of specified process)

Thursday, April 16, 2009

Nagios 3.0 Enterprise Monitoring.

Nagios is the industry standard in enterprise-class monitoring for good reason. It allows you to gain insight into your network and fix problems before customers know they even exist. It's stable, scalable, supported, and extensible. Most importantly, it works.

I have installed nagios 3.0 and i was monitoring following services.

1.) Sendmail & mail queue
2.) Apache web servers
3.) Bind DNS servers
4.) Netbackup master and media servers
5.) VMware ESX
6.) Dell poweredge server hardware monitoring. (OpenManger plugin)
7.) APC PDU (power unit)
8.) Routers & switches
10.) CPU, Memory & Disk utilization.
11.) NTP servers

This is my first nagios 3.0 implementation nagios status map picture.


Second picture of 3D map of infrastructure.

Monday, April 6, 2009

DimDim Open Source Video Conf. and Presentation

Meet the world's easiest web conference. Dimdim lets anyone deliver synchronized live presentations, whiteboards and web pages and share their voice and video over the Internet - with no download required.

Dimdim is a very simple to use browser-based web conferencing service. You can show presentations, collaborate via whiteboards, chat, talk and broadcast via webcam with absolutely no download required to host, attend or even record meetings*.

Let Try http://www.dimdim.com

Tuesday, March 24, 2009

EMC Self Study materials

Powerpath Foundations Impact\impact.exe
Replication Manager Foundations Impact\impact.exe
SAN Foundations Impact\impact.exe
SnapView Foundations Impact\impact.exe
SRDF Foundations Impact\impact.exe
SRDF Foundations Impact\Thumbs.db
Symmetrix Foundations Impact\impact.exe
TimeFinder Foundations Impact\impact.exe
VisualSAN and VisualSRM Foundations Impact\impact.exe
playerPRO.zip
Centera Foundations Impact\impact.exe
Centera Foundations Impact\Thumbs.db
CLARiiON Foundations Impact\clariion impact.exe
ControlCenter Foundations Impact\impact.exe
EMC Legato NetWorker Foundations Impact\impact.exe
Mirrorview and SAN Copy Impact\impact.exe
NAS Foundations Impact\impact.exe

Download following files to get CBT

hxxp://rapidshare.com/files/90442494/UP.part1.rar.html
hxxp://rapidshare.com/files/90456600/UP.part2.rar.html

Wednesday, February 25, 2009

NFS with ACL ignore Umask

NFS share at client side user umask is 0022 and i want to change file and folder creation permission on share folder but without touching umask variable.

Solution:

After lots of digging i found umask is not working for NFS and NFS share so i found there is support of ACL on NFS share so i have used ACL for NFS file and folder permissions here i am not going to explain in detail but i show you my example and further you can read ACL manual for advance knowledge. I have set few permission on NFS share folder so anybody on client side create file permission will be according to ACL it will ignore UMASK Variable of Linux thats sound like great. here we go

/share <-NFS share folder where i am going to put ACL rules.

setfacl --set u::rwx,g::rwx,o::rwx /share

setfacl -d --set u::rwx,g::rwx,g:mygroup:rw,o::x- /share

Second option "-d" will set permission default for all folders and files which will newly create.

after putting permission you can verify it by "getfacl" command and "ls -l" command will mark files and directories with "+" sign.

I need your comment on this please give your input.

Good Luck!!!

Saturday, January 31, 2009

What is bbPress

What is bbPress?

--------------------------------------------------------------------------------

bbPress is an internet forum package written in the PHP programming language and available under the GNU General Public License. bbPress is both open source and free software.

Origin:
The project was created by Matt Mullenweg to support users of WordPress. Existing bulletin-board software was overly sophisticated for those requirements, so bbPress was created with the same focus as WordPress: a functional and extensible core, with all other capabilities delivered through plugins.

Release History:
The first official release occurred on Oct 14th, 2006 and it was labeled as version 0.72 "bix", a revision number which was chosen (rather after than arrived at). Supported features included built in support for Akismet, integration with the WordPress user database, and RSS feed support. Early reviews described the release as "minimalist"
The announcement of bbPress 0.73 brought with it improved rewrite rules, a new template, support for languages other than English, and an easy-to-use installer similar to WordPress.
The latest official release 0.80 "Desmond"added more features, such as better timezone configuration and forum deletion.

Development:
The development of bbPress is formally managed through an issue tracking system. Informal discussion and support is available on the bbPress development forum

Features

Fast and light
Simple interface
Customizable templates
Highly extensible
Spam protection
RSS Feeds
Easy integration with your blog

Oracle Enterprise Linux

The Oracle Unbreakable Linux support program delivers enterprise-class support for Linux with premier backports, comprehensive management, indemnification, testing and more, all at significantly lower cost.

Both the Oracle Management Pack for Linux and Oracle Clusterware are free for Oracle Unbreakable Linux support customers. Oracle Validated Configurations provide best practices for easier, faster, and lower-cost Linux deployment.

With Oracle VM—a faster, lower cost server virtualization product—customers now have a single point of enterprise-class support for their entire virtualization environments.

Friday, January 9, 2009

Local YUM Repository

Sometimes, especially when you create your own RPMs, it is extremely useful to keep them in a local YUM repository. The advantage of this is that, when you install a package, YUM automatically resolves any dependencies, not only by downloading the necessary packages from the other repositories you might have in you list, but also by using your local repo as a resource for potential dependencies.

So, when installing a package (eg my_package.rpm) with YUM, you are supposed to have already created RPM packages for all of the my_package.rpm’s dependencies and to have updated the repository’s metadata, so that yum is able to resolve all the dependencies. If these dependencies do not exist in any of the repositories in your list, then, in short, you cannot install your package with yum.

How to create a local YUM repo

You will need an utility, named createrepo. Its RPM package exists in Fedora Extras. To install it, just run as root:

# yum install createrepo

Then put your all custom RPM packages into local directory (I am going to copy this RPMS on my apache web directory path). This command copy all RPMS on your CDROM to local system disk

#cp /mnt/cdrom/RedHat/RPMS/*.rpm /var/www/html/local_Redhat_repo

After copying run this command to create metadata for repo, This command will create new with name "repodata" inside /var/www/html/local_Redhat_repo

#createrepo /var/www/html/local_Redhat_repo

Now restart your apache webserver

#service httpd restart

Create new file in /etc/yum.repos.d/local.repo and add this line in that file

[local]
name=RedHat-$releasever - Base
baseurl=http://127.0.0.1/local_Redhat_repo
enabled=1
gpgcheck=0


Now to test this setup run this command

#yum install list
#yum grouplist
#yum install .rpm


Notes:- I am using HTTP server on my setup but you can use NFS, SMB, FTP or Local directory to access repo

Wednesday, January 7, 2009

EMC Powerpath Software

I am having a lot of servers actually connected to various EMC storages like Symmetrix, Clariion. As with all storage softwares, the biggest challenge is to manage the multi-path devices and to ensure that devices remain on OS even in case of a Service processor failure or an HBA card failure.

As with all other storages like HP, SUN etc. EMC provides a software known as EMC Powerpath. This software allows one to map the OS devices to a pseudo block device without having to worry about the device paths.

For e.g. on a Linux system, HBA card 1 can give a device name as /dev/sda and the same device via HBA card 2 could have /dev/sdf or some other name. This setup can be really confusing if someone decides to use the devices on the basis of there SCSI device IDs. Lets say someone uses /dev/sda and due to power outage or service processor failure on SAN switch, the paths gets reversed. In that case,

/dev/sda will no longer be primary.
/dev/sdf will become primary.

But due to this path change, /etc/vfstab (Solaris) and /etc/fstab (Linux) configs would go foo-bar.

To save us from this hassel, EMC powerpath maps the OS block devices with the pseudo /dev/emcpower[a-z] devices.

This mapping can be checked using the command:-

powermt display dev=all


Powerpath software saves the device mapping info in a file /etc/opt/emcpower/emcpower.conf or /etc/emcp_devicesDB.idx & /etc/emcp_devicesDB.dat depending upon the versison of Powerpath software.

These mapped devices emcpower[a-z] can be partitioned & used for a filesystem (by running mkfs on them) or even as a rawdevice. It really boils down to how you wanna use them.

Always use emcpower pseudo devices in /etc/fstab or /etc/vfstab configurations or in /etc/sysconfig/rawdevices (For raw device mapping).